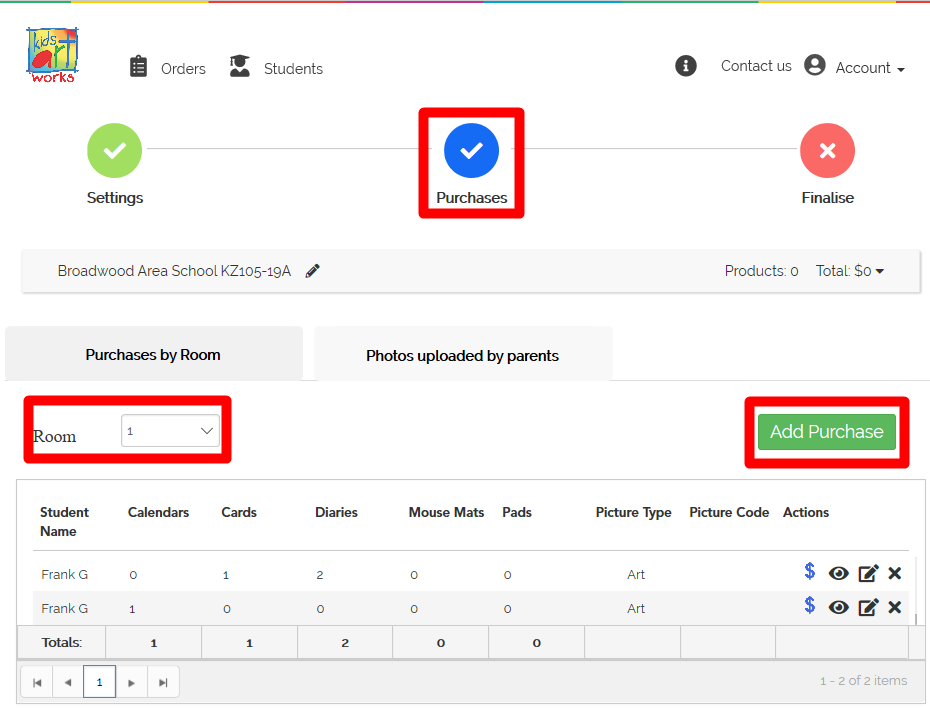
Record each student’s purchase into the appropriate classroom.
- Select the correct Room from the drop-down list.
- Click “Add Purchase.”
- Enter the student’s name.
- It is recommended you enter the first and last name in case you have students with the same first name.
- If you are entering a student’s name that has already been saved, please select them from the drop-down list that will pre-populate as you type rather than add the same student name twice (which will duplicate them in the database).
- Enter the quantity of each product and click the green tick mark.
- This will automatically set the Picture Type to Art i.e. you have a piece of art to send us.
- If you want to upload a photo for a student, change the picture type to Upload and follow the instructions.

- Once you have added in all the Purchases, click “Next.”
How to edit the row once it is saved:
- You can click ‘X’ to delete the row.
- You can click the pencil icon to edit the quantities.